Halloween Chocolate Bark serves as a visually striking, snackable dessert that combines melted premium chocolate with seasonal candies and festive decorations. This simple treat provides a perfect balance of rich cocoa flavors and sugary crunch, making it a reliable crowd-pleaser for any autumn gathering or holiday celebration. Bakers appreciate this recipe for its speed, versatility, and the ability to customize ingredients based on personal preferences.
| Prep Time | Cook Time | Total Time | Servings | Difficulty | Cuisine |
|---|---|---|---|---|---|
| 10 minutes | 5 minutes | 2 hours | 12 | Easy | American |
Why This Recipe Works
This recipe works because it relies on high-quality tempered chocolate and contrasting textures to deliver a professional result without complex kitchen equipment. The natural fats in the chocolate provide a smooth mouthfeel, while the addition of crunchy candies creates the necessary textural variety required for a satisfying bite. By using a basic pour-and-chill method, you eliminate the stress associated with baking traditional holiday cookies or elaborate layered desserts.
Experience shows that the most successful batches balance sweet and salty elements by incorporating sea salt or pretzel pieces. Because this bark hardens quickly, you can prepare it well in advance, leaving you more time for other party preparations. This consistency ensures that every piece remains stable at room temperature for several hours, making it ideal for large platters.
Ingredients
| Ingredient | Quantity | Notes |
|---|---|---|
| Dark Chocolate Chips | 16 ounces | Use high-quality Ghirardelli or Guittard |
| White Chocolate Chips | 4 ounces | Used for drizzling effects |
| Candy Corn | 0.5 cup | Traditional seasonal classic |
| Mini Pretzels | 1 cup | Adds essential salty crunch |
| Halloween Sprinkles | 0.25 cup | Use black, orange, and purple hues |
| Gel Food Coloring | 2 drops | Orange or purple for white chocolate |
Step-by-Step Instructions
Preparation and Melting
- Line a large baking sheet with high-quality parchment paper to ensure the bark releases easily after setting.
- Melt the dark chocolate in a glass bowl using a microwave on medium power in thirty-second intervals.
- Stir the chocolate thoroughly after each interval to prevent overheating and maintain a glossy finish.
Assembly and Finishing
- Pour the melted chocolate onto the prepared tray, spreading it to an even thickness of approximately one-quarter inch.
- Melt the white chocolate in a separate bowl and stir in the gel food coloring until reaching your desired shade.
- Drizzle the colored white chocolate over the dark base using a spoon to create artistic marbled patterns.
- Scatter the candy corn, pretzels, and sprinkles across the surface while the chocolate remains warm.
- Refrigerate the tray for at least two hours or until the bark is firm and set completely.
- Break the solid sheet into irregular, bite-sized shards by hand or with a heavy knife.
Chef Tips for Perfect Results
- Use high-quality chocolate with at least 60 percent cocoa solids to achieve a sophisticated and rich flavor profile.
- Ensure your bowls and utensils are perfectly dry because even a single drop of water will seize the chocolate.
- Spread the melted chocolate quickly across the pan to ensure consistent thickness for even breaking later.
- Add toppings immediately after spreading the chocolate base to ensure they adhere firmly once the mixture cools.
- Store the finished bark in an airtight container in a cool, dry area to prevent the candy from sweating.
Common Mistakes to Avoid
- Overheating chocolate: This causes the fats to separate and leads to a grainy, dull texture that ruins the aesthetic appeal.
- Adding water: Moisture contact causes the chocolate to seize into a hard clump that cannot be salvaged for this recipe.
- Using low-quality candy: Cheap candy coatings contain excessive wax that leaves a film in your mouth and detracts from the chocolate.
- Slicing too early: Breaking the bark before it is fully set results in messy, crumbled edges instead of clean, sharp shards.
Variations and Substitutions
| Ingredient | Substitution | Impact on Flavor |
|---|---|---|
| Dark Chocolate | Milk Chocolate | Significantly sweeter profile |
| Mini Pretzels | Roasted Peanuts | Nutty, buttery depth |
| Candy Corn | Pumpkin Seeds | Earthy, crunchy addition |
Serving Suggestions and Pairings
Serve this bark on a dark ceramic platter to make the festive colors pop during a Halloween-themed dinner party. It pairs perfectly with hot apple cider or a warm mug of spiced cocoa. For a more sophisticated arrangement, place shards inside individual cellophane bags tied with twine as party favors for your guests.
Storage and Reheating
| Method | Duration | Instructions |
|---|---|---|
| Countertop | 1 week | Store in a sealed container in a cool room |
| Refrigerator | 3 weeks | Keep in a plastic bag to prevent moisture |
| Freezer | 3 months | Double wrap in foil and plastic to prevent odor absorption |
Nutritional Information
| Nutrient | Amount per Serving (Approximate values) |
|---|---|
| Calories | 180 kcal |
| Fat | 12g |
| Carbohydrates | 22g |
| Sugar | 18g |
| Protein | 2g |
Frequently Asked Questions
Can I use milk chocolate instead of dark?
You can substitute milk chocolate for dark chocolate without changing the measurements. The final result will be significantly sweeter and have a lighter color profile.
How do I prevent the chocolate from seizing?
Avoid any contact with water by ensuring all your equipment is completely dry before starting. If your chocolate begins to thicken, add one teaspoon of coconut oil to thin it out.
What is the best way to melt chocolate?
The microwave method is the most efficient for beginners when used at 50 percent power. Stir the chocolate frequently to ensure the heat distributes evenly through the bowl.
Can I make this bark a week early?
Halloween Chocolate Bark stays fresh for up to three weeks when stored in an airtight container. Keep the container in a cool, dark place to maintain the best quality.
How do I get clean breaks?
Ensure the chocolate is completely chilled and firm before you begin breaking the bark. A sharp, heavy knife can help create cleaner lines if you prefer uniform pieces.
Halloween Chocolate Bark provides a quick and professional solution for your holiday treat needs. By mastering these simple techniques, you create a customizable dessert that impresses every guest at your table. Whether you choose to add extra salt or experiment with unique toppings, your batch will surely disappear before the night ends. Embrace this reliable recipe this season for a decadent, stress-free experience that highlights the rich, comforting essence of premium cocoa.
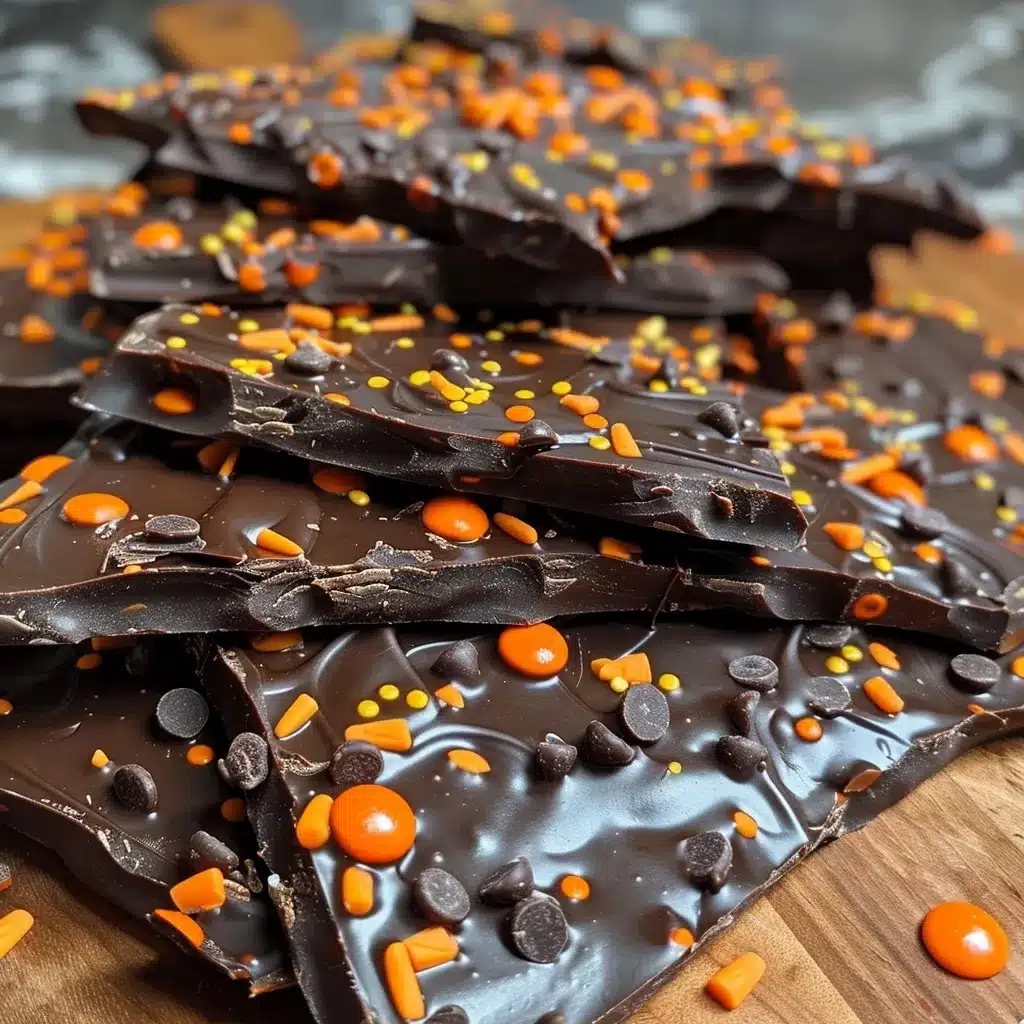
Halloween Chocolate Bark
Ingredients
Method
- Line a large baking sheet with parchment paper.
- Melt the dark chocolate in a glass bowl in the microwave at medium power in 30-second intervals, stirring thoroughly between each interval.
- Pour the melted dark chocolate onto the prepared tray, spreading it to an even quarter-inch thickness.
- Melt the white chocolate in a separate bowl and stir in the gel food coloring.
- Drizzle the colored white chocolate over the dark chocolate layer using a spoon or fork.
- Immediately sprinkle the candy corn, mini pretzels, and festive sprinkles over the melted chocolate.
- Allow the bark to set completely in a cool place or refrigerator for at least 2 hours before breaking into individual pieces.