Peanut Butter Spider Cookies are festive Halloween treats featuring creamy peanut butter dough topped with a chocolate truffle spider. These cookies deliver a perfect balance of salty nut butter and rich cocoa, making them a centerpiece for any seasonal gathering. You create a whimsical design using simple pantry staples while maintaining professional quality results. This recipe satisfies your craving for thematic desserts without requiring advanced cake decorating skills or professional kitchen tools.
Why This Recipe Works
This recipe works because it relies on a reliable, non-spreading peanut butter cookie base that holds its shape during the bake. The structure allows for a perfectly indented center, which is necessary for securing the chocolate spider after the cookies emerge from the oven.
I developed this method to ensure the chocolate elements melt just enough to adhere to the cookie without losing their defined shape. The contrast between the soft, chewy peanut butter dough and the firm, crunchy chocolate spider creates an enjoyable sensory experience for both children and adults alike.
Recipe Overview
| Metric | Details |
|---|---|
| Prep Time | 15 minutes |
| Cook Time | 12 minutes |
| Total Time | 27 minutes |
| Servings | 24 cookies |
| Difficulty | Easy |
| Cuisine | American |
Ingredients
| Ingredient | Quantity | Notes |
|---|---|---|
| Creamy Peanut Butter | 1 cup | Use classic commercial brands for consistent texture |
| Granulated Sugar | 1 cup | Provides essential crunch and structure |
| Egg | 1 large | Binds the ingredients together |
| Chocolate Truffles | 24 pieces | Use round truffles or chocolate-covered caramels |
| Semi-Sweet Chocolate Chips | 1/2 cup | Melted to create spider legs |
Step-by-Step Instructions
Preparing the Dough
- Preheat your oven to 350 degrees Fahrenheit and line two large baking sheets with parchment paper.
- Cream the peanut butter, sugar, and egg in a large mixing bowl until the mixture appears smooth and well-incorporated.
- Scoop rounded tablespoons of dough and roll them into balls using your palms.
- Space the dough balls two inches apart on the prepared baking sheets to allow for even airflow.
Baking and Assembly
- Bake the cookies for 10 to 12 minutes until the edges turn a light golden brown color.
- Remove the trays from the oven and immediately press the center of each cookie with the back of a spoon to create a small crater.
- Place a chocolate truffle into each indentation while the cookies remain warm.
- Transfer the cookies to a wire rack to cool completely before adding the final decorations.
- Pipe melted chocolate onto the sides of each truffle to form eight spider legs per cookie.
Chef Tips for Perfect Results
- Use room temperature eggs to ensure the emulsion process happens quickly and efficiently during mixing.
- Do not overbake the cookies, as they continue to cook from the residual heat on the tray.
- Chill the dough for thirty minutes if your kitchen environment is particularly warm to prevent excessive spreading.
- Place the chocolate truffles in the refrigerator for one hour before assembly to help them hold their shape.
- Use a small piping bag with a tiny tip or a toothpick to draw thin, precise spider legs.
Common Mistakes to Avoid
- Overmixing the dough results in tough cookies; mix only until the ingredients combine fully.
- Using natural peanut butter instead of commercial brands causes the oil to separate and results in greasy cookies.
- Adding the chocolate truffles while the oven is still on causes the chocolate to liquefy and lose its shape.
- Skipping the parchment paper causes the cookies to stick, making it difficult to transfer them to a cooling rack.
Variations and Substitutions
| Ingredient | Substitution | Impact |
|---|---|---|
| Peanut Butter | Almond Butter | Changes the flavor profile to be more subtle and earthy |
| Granulated Sugar | Brown Sugar | Increases chewiness and adds a hint of caramel flavor |
| Chocolate Truffles | Chocolate Kisses | Changes the spider shape but maintains chocolate intensity |
Serving Suggestions and Pairings
Serve these cookies alongside warm glasses of milk or spiced apple cider for an autumn-inspired snack. They pair perfectly with other holiday classics like pumpkin muffins or caramel popcorn for a complete party spread. These treats work well for school events, office potlucks, or family movie nights during October.
Storage and Reheating
| Method | Duration | Instructions |
|---|---|---|
| Countertop | 5 days | Store in an airtight container at room temperature |
| Freezer | 3 months | Flash freeze before placing in a heavy-duty freezer bag |
Nutritional Information
| Nutrient | Amount per Serving |
|---|---|
| Calories | 145 kcal |
| Protein | 4g |
| Fat | 9g |
| Carbohydrates | 18g |
Approximate values.
Frequently Asked Questions
Can I make these peanut butter spider cookies gluten-free?
You can easily make this recipe gluten-free by ensuring your ingredients are certified gluten-free, as this recipe does not require flour. Verify that your chocolate truffles are processed in a gluten-free facility to maintain safety for celiac guests.
How do I prevent the spider legs from smearing?
Ensure the cookies have cooled completely for at least forty minutes before piping the chocolate legs. Cold cookies provide a firm surface that prevents the melted chocolate from sliding or smearing during the decoration process.
What should I do if the cookies spread too much?
Increase the amount of peanut butter slightly or chill the dough balls for an additional twenty minutes before baking. Keeping the fat content solid until it enters the heat of the oven prevents excessive flattening.
Can I prepare the dough ahead of time?
You can prepare the dough up to three days in advance and keep it stored in the refrigerator. Allow the dough to sit on the counter for ten minutes before rolling into balls to make the mixture easier to handle.
Why do my chocolate truffles melt when I put them on the cookies?
The cookies are likely too hot when you apply the chocolate; wait two minutes after pulling the tray from the oven. This brief cooling period creates enough heat to settle the truffle but not enough to compromise its structure.
Peanut Butter Spider Cookies offer a fun and delicious way to celebrate Halloween with minimal effort. By following these simple steps and tips, you ensure a successful bake that everyone will enjoy. Enjoy the process of creating these spooky, sweet treats for your friends and family this season.
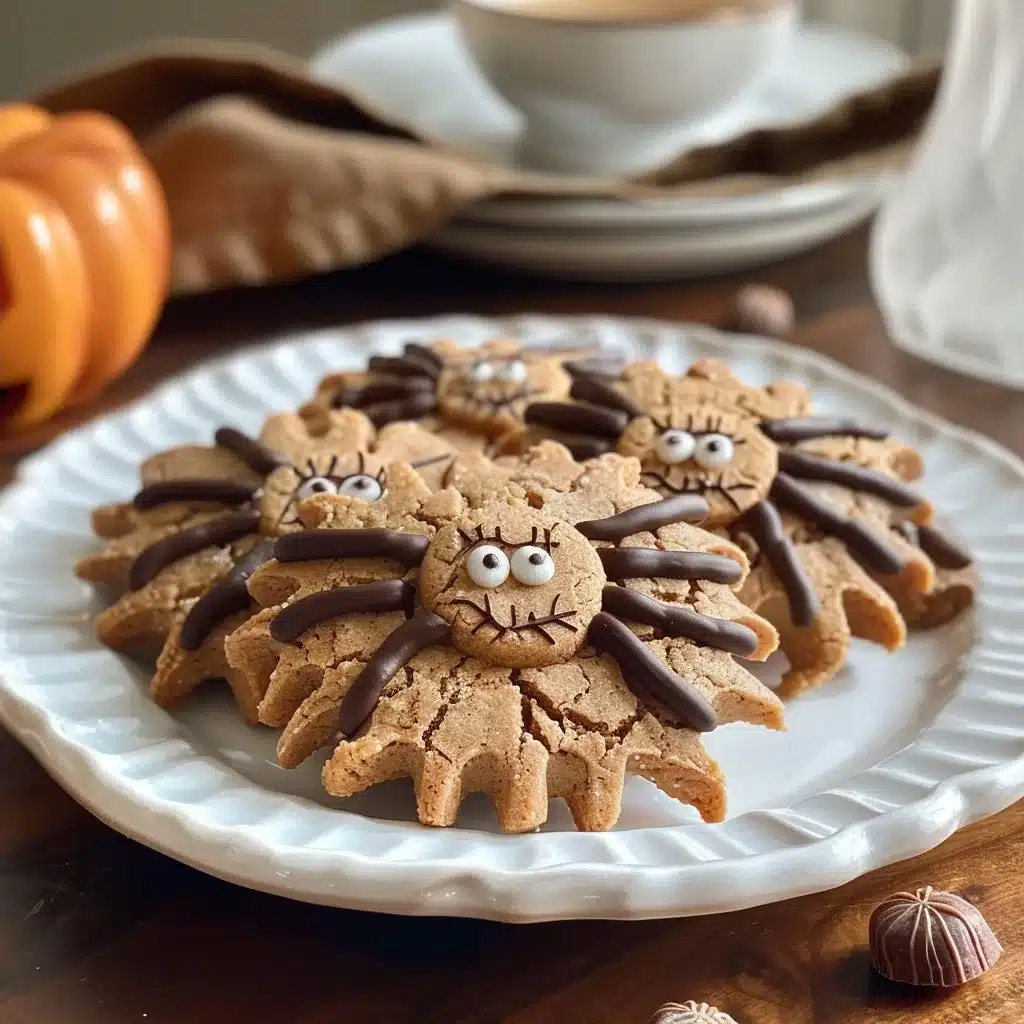
Peanut Butter Spider Cookies
Ingredients
Method
- Preheat your oven to 350 degrees Fahrenheit and line two large baking sheets with parchment paper.
- Cream the peanut butter, sugar, and egg in a large mixing bowl until the mixture appears smooth and well-incorporated.
- Scoop rounded tablespoons of dough and roll them into balls using your palms.
- Space the dough balls two inches apart on the prepared baking sheets to allow for even airflow.
- Bake the cookies for 10 to 12 minutes until the edges turn a light golden brown color.
- Remove the trays from the oven and immediately press the center of each cookie with the back of a spoon to create a small crater.
- Place a chocolate truffle into each indentation while the cookies remain warm.
- Allow the cookies to cool completely before using the melted chocolate to pipe eight spider legs extending from the truffle onto the cookie surface.