A Quick and Easy Pear Crumble Recipe provides a simple, foolproof way to create a warm, comforting dessert using fresh seasonal fruit and a buttery, crisp topping. This streamlined process ensures that even novice bakers achieve golden-brown results without complicated techniques or specialty equipment. You will find this classic dish pairs perfectly with a scoop of vanilla bean ice cream for an impressive yet relaxed post-dinner treat.
| Prep Time | Cook Time | Total Time | Servings | Difficulty | Cuisine |
|---|---|---|---|---|---|
| 15 mins | 35 mins | 50 mins | 6 | Easy | Classic |
Why This Recipe Works
This recipe succeeds because it prioritizes the texture contrast between soft, sweet pears and the crunchy, buttery oat topping. I designed these ratios to ensure the fruit releases enough juices to create a light syrup rather than a soggy mess during the baking process.
My experience testing various fruit-to-topping proportions proves that a slightly thicker crumble layer provides the best structural integrity. By using a combination of brown sugar and oats, we achieve a deep caramel profile that enhances the natural sweetness of ripe pears without overpowering them.
Ingredients
| Ingredient | Quantity | Notes |
|---|---|---|
| Ripe Pears | 6 medium | Bartlett or Bosc work best |
| Granulated Sugar | 1/4 cup | Substitute with honey if preferred |
| All-Purpose Flour | 1 cup | Use oat flour for a gluten-free twist |
| Rolled Oats | 1 cup | Old-fashioned oats provide better texture |
| Brown Sugar | 3/4 cup | Pack firmly for accuracy |
| Unsalted Butter | 1/2 cup (1 stick) | Chill before using for better crunch |
| Cinnamon | 1 teaspoon | Optional for added warmth |
Step-by-Step Instructions
Fruit Preparation Phase
- Preheat your oven to 375 degrees Fahrenheit to ensure an even bake.
- Peel, core, and slice the pears into uniform half-inch thick wedges for consistent cooking.
- Toss the sliced pears with granulated sugar and a quarter teaspoon of cinnamon in a large mixing bowl.
- Transfer the prepared fruit mixture into a greased nine-inch baking dish.
Topping Assembly Phase
- Combine the flour, rolled oats, brown sugar, and remaining cinnamon in a separate bowl.
- Cut the cold butter into small cubes and press it into the dry mixture using a fork or your fingers until crumbly.
- Spread the oat mixture evenly over the top of the prepared pear layer.
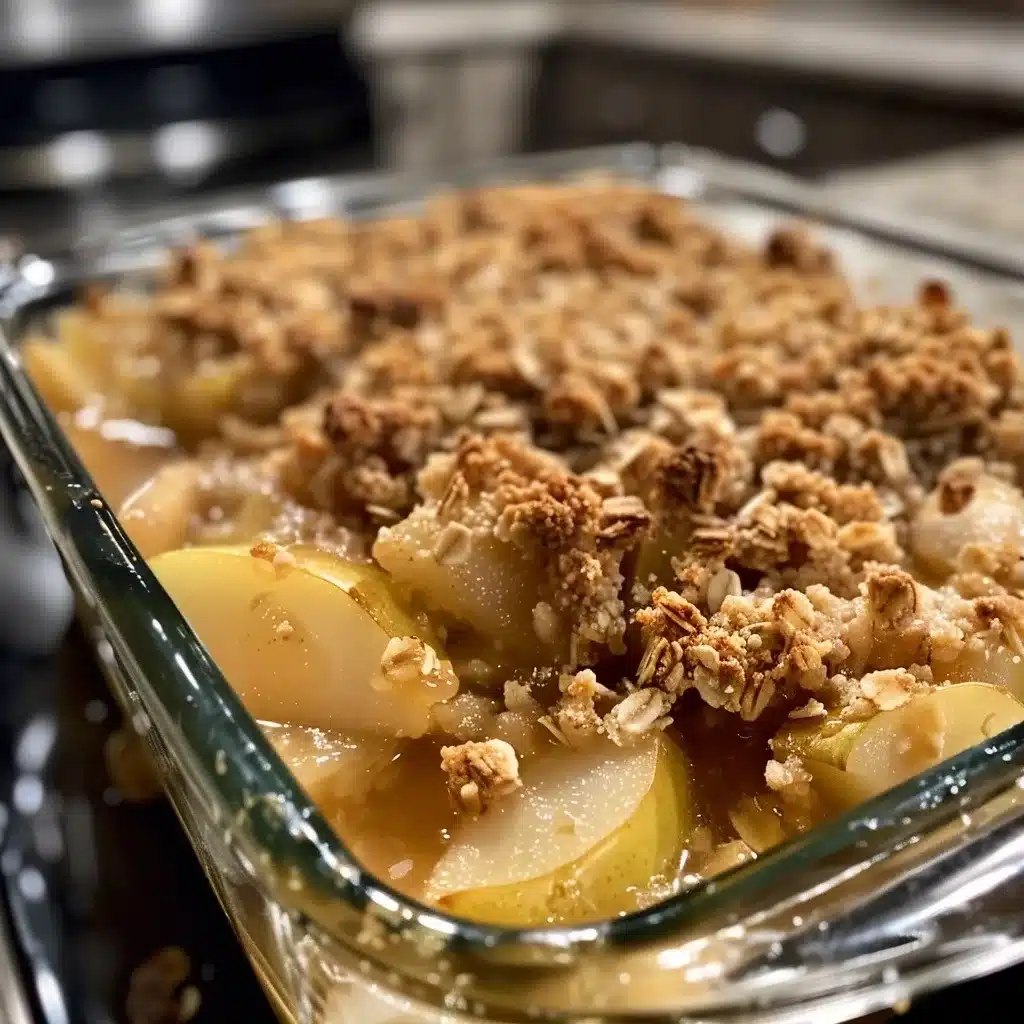
- Bake for thirty-five minutes or until the topping turns golden brown and the fruit juices bubble around the edges.
Chef Tips for Perfect Results
- Select pears that are slightly firm to the touch to prevent them from turning into mush during the baking duration.
- Keep the butter freezing cold until the last moment to ensure the crumble topping remains distinct and textured rather than greasy.
- Stir the fruit mixture thoroughly to coat every pear slice, as this encourages the release of juices that form the bottom sauce.
- Allow the dish to rest for ten minutes after removing it from the oven to let the sugary juices thicken slightly.
Common Mistakes to Avoid
Do not use overripe pears, as they contain excess moisture that will result in a watery bottom layer. Use firm, seasonal fruit for the best structural outcome. Avoid over-mixing the topping, as this collapses the oat clusters into a heavy dough rather than a crisp layer. Always bake until the topping reaches a deep golden hue to ensure the flour is fully cooked. If your topping browns too quickly, cover it loosely with aluminum foil to protect the oats while the fruit finishes cooking.
Variations and Substitutions
| Ingredient | Substitution | Impact on Flavor |
|---|---|---|
| Pears | Apples | Adds slight acidity and crunch |
| Oats | Almond Flour | Nutty flavor and lower carbs |
| Cinnamon | Cardamom | Floral and aromatic shift |
Serving Suggestions and Pairings
This dish serves exceptionally well during autumn dinner parties or as a comforting companion to a hot cup of black tea. Top each warm serving with a generous dollop of unsweetened whipped cream or high-quality vanilla custard to balance the sugar. The contrast of the hot fruit and cold topping makes this a sophisticated dessert for any family gathering.
Storage and Reheating
| Method | Duration | Instructions |
|---|---|---|
| Fridge | 3 Days | Cover with plastic wrap or airtight container |
| Oven | 15 mins | Reheat at 350 degrees until warmed through |
| Microwave | 1 min | Heat in 30-second intervals to avoid sogginess |
Nutritional Information
Approximate values per serving.
| Nutrient | Amount per Serving |
|---|---|
| Calories | 280 kcal |
| Fat | 10g |
| Carbohydrates | 48g |
| Fiber | 5g |
| Protein | 3g |
Frequently Asked Questions
Can I make this pear crumble ahead of time?
You can prepare the fruit and topping separately one day in advance, storing them in the refrigerator until ready to assemble. Assemble and bake the dish immediately before serving for the freshest texture and crispest topping.
How do I know when the crumble is done baking?
The crumble is fully cooked when the topping turns a deep golden brown and the fruit juices are bubbling visibly around the edges. A sharp knife should pierce the pears with almost no resistance.
What if my pears are very soft?
If your pears are soft, reduce the baking time by five minutes and use a wider baking dish to maximize surface area. Increasing surface area helps the moisture evaporate more efficiently during the process.
Can I swap the butter for an oil alternative?
You may use chilled solid coconut oil as a direct one-to-one substitute for butter. This provides a similar fat structure while adding a subtle tropical aroma that complements the pears.
How do I fix a soggy crumble top?
A soggy top occurs if you bake the dish with a lid on or if the fruit has too much liquid. If the top feels soft, place the dish under the broiler for two minutes to crisp the oats.
Conclusion
Creating a quick and easy pear crumble is an essential skill for any home cook looking to master seasonal fruit desserts. By focusing on firm pears and cold butter, you ensure a consistent result every time you enter the kitchen. This simple recipe provides all the warmth and comfort required for a perfect evening. Enjoy the natural sweetness of the fruit paired with a crunchy oat top during your next gathering.
Quick and Easy Pear Crumble
Ingredients
Method
- Preheat your oven to 375 degrees Fahrenheit.
- Peel, core, and slice the pears into uniform half-inch thick wedges.
- In a large bowl, toss the pears with granulated sugar and 1/4 teaspoon of cinnamon.
- Transfer the pear mixture into a greased nine-inch baking dish.
- In a separate bowl, combine flour, rolled oats, brown sugar, and the remaining 3/4 teaspoon of cinnamon.
- Cut the cold butter into small cubes and work it into the dry mixture until it becomes crumbly.
- Spread the oat crumble mixture evenly over the top of the pears.
- Bake for 35 minutes or until the topping is golden brown and the fruit juices bubble.