Zebra Cakes are the ultimate throwback treat soft sponge layers, creamy filling, and a sweet white coating with signature chocolate stripes. This easy copycat recipe brings all the charm of the classic Little Debbie snack cakes, right from your own kitchen. Whether you’re packing lunchbox treats or planning a birthday party, these homemade snack cakes are fresher, fluffier, and full of nostalgia. I’m Emma from EastMealsToDo, and with Alex, we’ve recreated this retro dessert with a fun twist. If you love easy no-bake dessert ideas or just want a store-bought alternative, these Zebra Cakes are sure to be a hit.
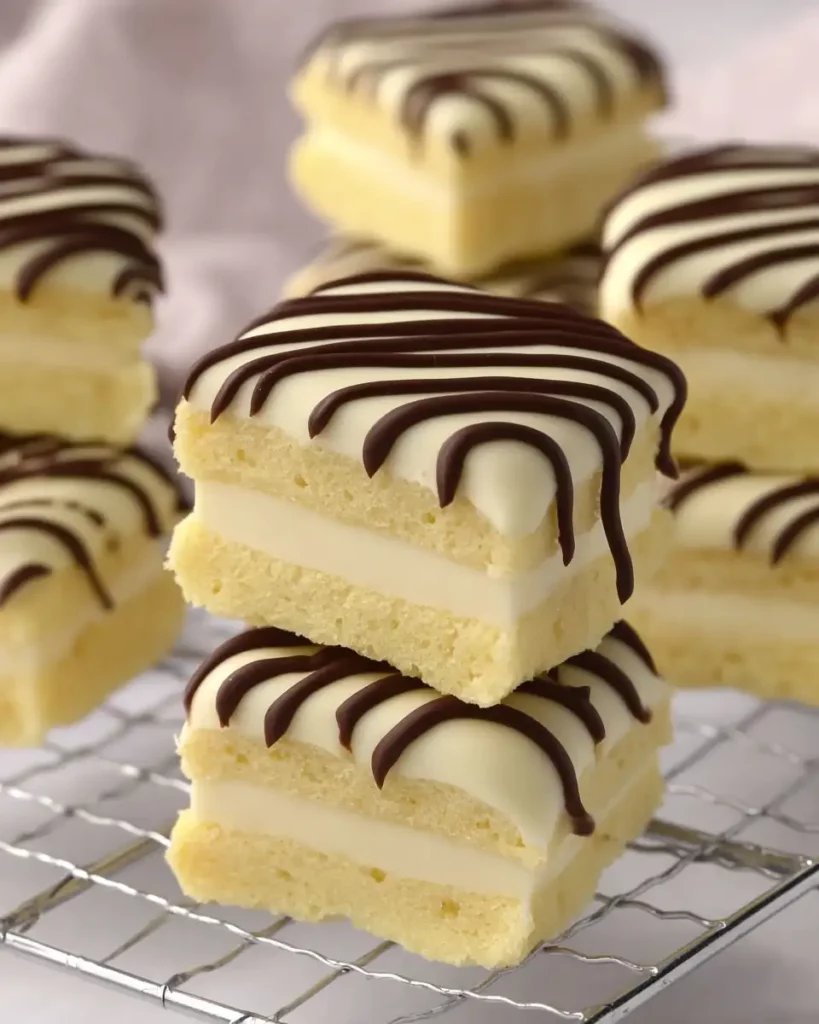
Table of Contents
Table of Contents
A Sweet Slice of Nostalgia
Why We All Love Zebra Cakes
There was a time when opening your lunchbox and seeing a Zebra Cake felt like winning the dessert lottery. It was soft, sweet, and perfectly portioned. The classic Zebra Cakes we all remember came from the Little Debbie box shiny wrappers hiding a sugary surprise. These treats weren’t just sugar they were a childhood rite of passage.
Hi, I’m Alex, the heart and soul behind eastmealstodo.com. I remember when my brother and I used to sneak Zebra Cakes from the pantry after school. We’d carefully split them one bite at a time just to savor that signature cream filling and vanilla glaze. Alex, my co-creator and culinary sidekick, still swears no birthday party was complete without a plate stacked with these striped beauties.
Making homemade Zebra Cakes now isn’t just about recreating a flavor. It’s about reliving a memory and passing it down only now with better ingredients, a little more love, and zero preservatives.
Throughout this article, you’ll discover why this copycat Little Debbie Zebra Cake recipe is a store-bought alternative worth mastering. Not only does it capture the iconic look and taste, but it’s also way more fun (and delicious) when made from scratch.
We’ve included helpful tips to make this recipe approachable even if you’re not a pro baker. And if you’re planning a birthday party dessert table or need kids dessert ideas for school lunches, these snack cakes hit all the right notes.
Looking for more homemade lunchbox favorites? You’ll love our Candy Apple Cookie Recipe and these gooey Cupcakes Happy Birthday that are another nostalgic throwback.
How To Coat Copycat Zebra Cakes
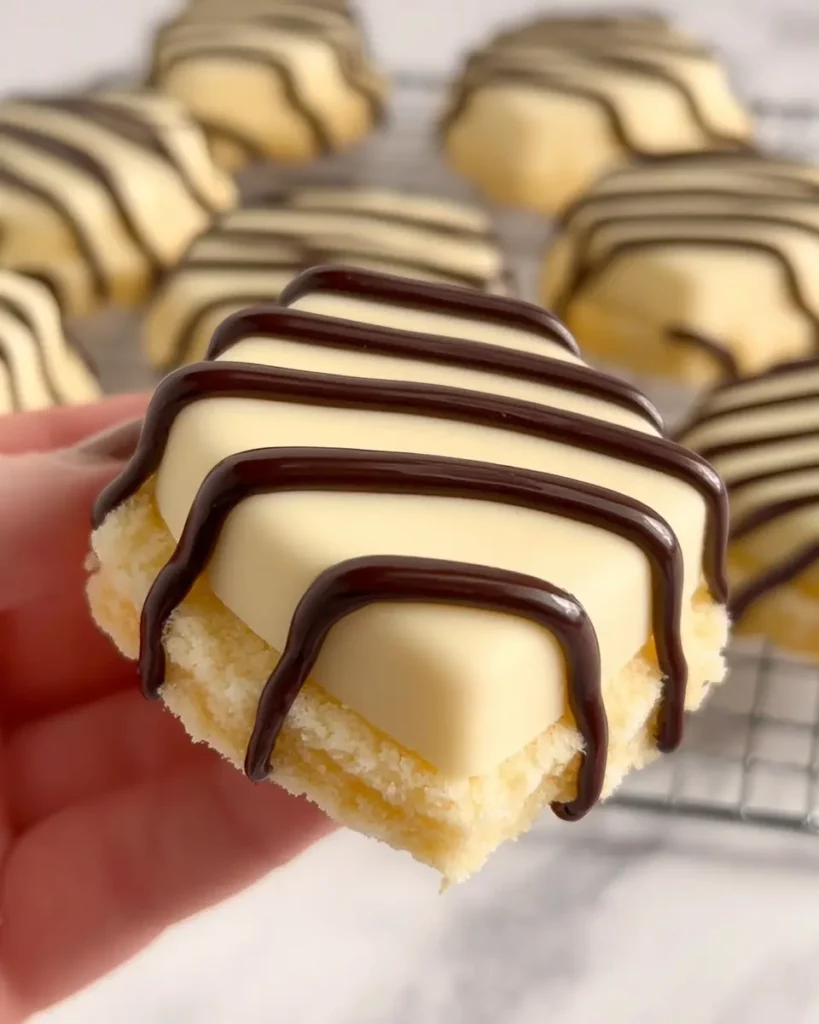
Coating copycat Zebra Cakes is easier than it looks. After assembling your layered snack cakes and freezing them for about 30 minutes (this helps them stay firm), you’ll dip each one into melted white candy coating or white chocolate.
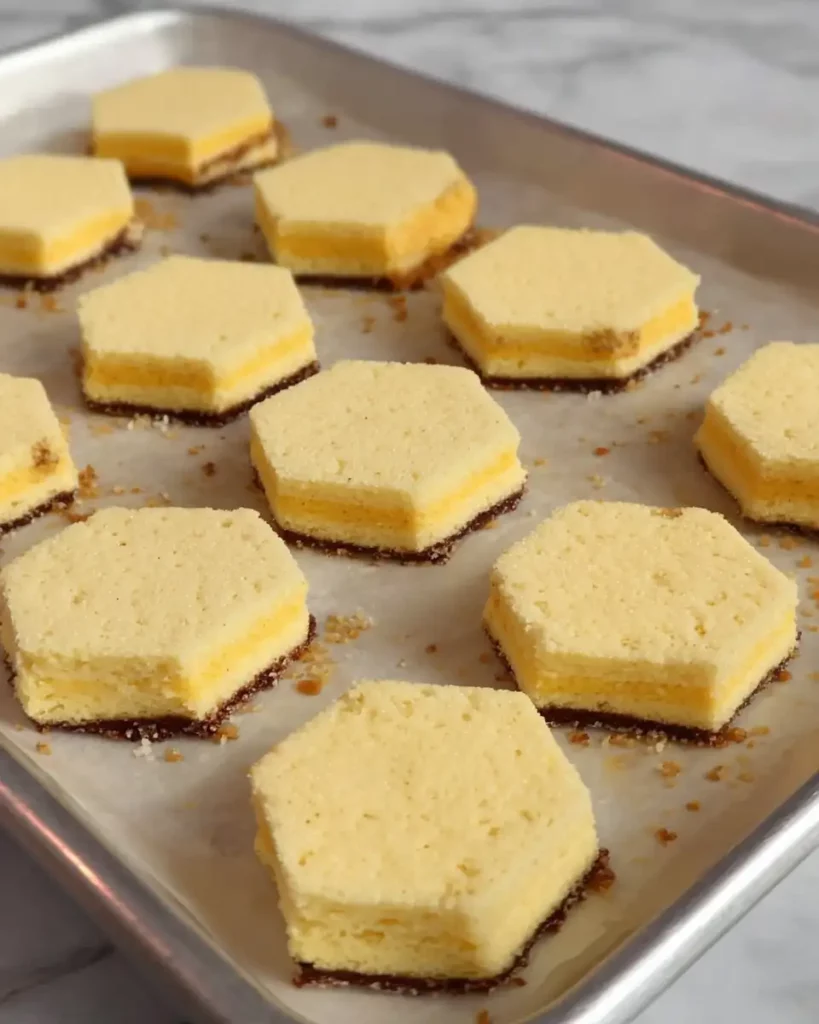
Use a fork or dipping tool to lower each cake into the melted coating, then lift it out, gently tapping off excess. Place each coated cake on a parchment-lined tray. For the signature stripes, melt semi-sweet or dark chocolate and drizzle it over the top using a piping bag or spoon.
Let them set at room temperature or chill until firm.
Making the Perfect Filling
The classic Zebra Cake filling is light, fluffy, and sweet similar to marshmallow cream but much smoother. For this copycat version, the perfect filling comes from a combination of butter, powdered sugar, vanilla extract, and marshmallow creme (fluff).
Whip softened butter until creamy, then gradually beat in powdered sugar until smooth. Add a generous spoonful of marshmallow creme and a splash of vanilla. Continue beating until the filling is fluffy and spreadable.
This cream holds its shape between cake layers without being too heavy, giving your homemade snack cakes that authentic soft bite everyone loves.
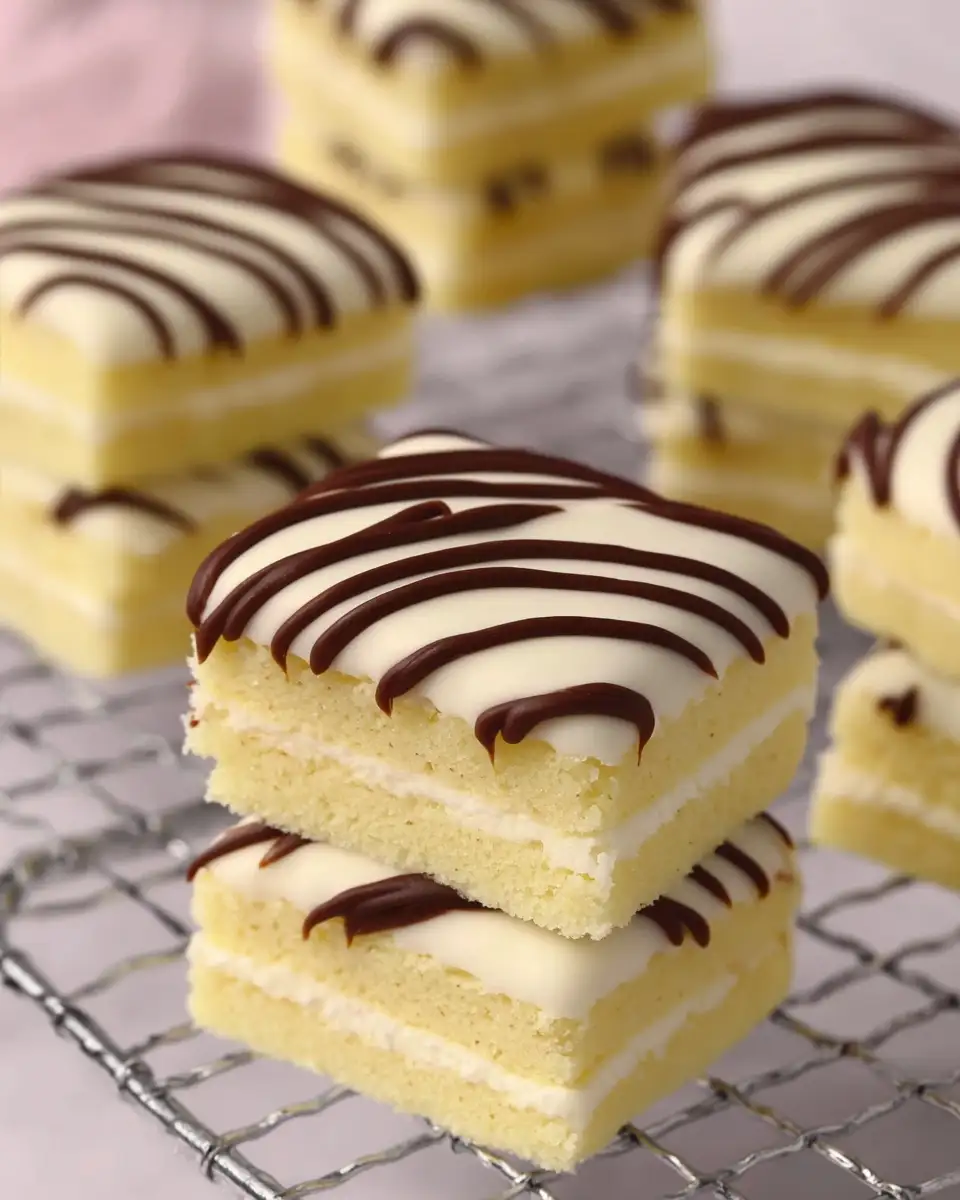

Zebra Cakes (Copycat Little Debbie)
Ingredients
Equipment
Method
- Bake the cake in a parchment-lined 9×13 pan according to box directions. Let cool.
- Cut cooled cake into small rounds using a 2–3 inch cookie cutter.
- Freeze rounds for 20 minutes.
- Beat butter until smooth, then add powdered sugar, marshmallow creme, vanilla, and salt. Whip until fluffy.
- Pipe or spread filling onto half the rounds. Top with the other half to form sandwiches.
- Freeze assembled cakes for 30 minutes.
- Melt white candy melts or white chocolate with optional coconut oil.
- Dip each cake to coat completely, tapping off excess.
- Melt chocolate chips with coconut oil. Drizzle over coated cakes.
- Chill until chocolate is set. Serve or store.
Nutrition
Notes
Tried this recipe?
Let us know how it was!Recipe Snapshot
| Feature | Details |
|---|---|
| Recipe Name | Zebra Cakes (Copycat Little Debbie) |
| Prep Time | 30 minutes |
| Cook Time | 12 minutes |
| Total Time | 1 hour (includes chilling and assembly) |
| Yield | 10–12 snack cakes (depending on cutter size) |
| Skill Level | Easy to Moderate |
| Key Flavors | Vanilla sponge, marshmallow cream, white coating, chocolate drizzle |
| Best For | Birthday parties, Lunchbox treats, Retro dessert trays, Kid snacks |
Ingredients for Zebra Cakes
For the Cake:
- 1 box white cake mix (or homemade vanilla sponge)
- 1 cup water
- ⅓ cup vegetable oil
- 3 large egg whites (for a lighter crumb)
For the Marshmallow Cream Filling:
- ½ cup unsalted butter (softened)
- 1½ cups powdered sugar
- 1 cup marshmallow creme (like Marshmallow Fluff)
- 1 teaspoon vanilla extract
- Pinch of salt
For the Coating:
- 12 oz white candy melts (or white chocolate chips)
- 1 tablespoon coconut oil (optional, for smoother coating)
For the Zebra Stripes:
- ¼ cup semi-sweet chocolate chips or melting wafers
- ½ teaspoon coconut oil (optional, helps with drizzling)
How to Make Zebra Cakes Recipe
Step 1: Bake the Cake
Prepare the white cake batter according to the package directions (or your favorite homemade recipe). Pour the batter into a parchment-lined 9×13-inch pan for thin, even layers. Bake at 350°F (175°C) for 18–22 minutes or until a toothpick comes out clean. Let it cool completely.
Step 2: Cut the Cake
Once cool, use a round cookie cutter (about 2–3 inches) to cut out cake circles. You should get about 20–24 rounds. Freeze the rounds for 20 minutes to make filling and coating easier.
Step 3: Make the Filling
In a bowl, beat softened butter until smooth. Add powdered sugar gradually. Mix in marshmallow creme, vanilla extract, and a pinch of salt. Beat until light and fluffy.
Step 4: Assemble the Cakes
Spread or pipe the filling onto half of the cake rounds. Top with the other halves to make sandwich cakes. Freeze the assembled cakes for another 20–30 minutes.
Step 5: Coat in White Chocolate
Melt white candy melts (or white chocolate with a bit of coconut oil) in a microwave-safe bowl, stirring every 30 seconds. Dip each Zebra Cake into the coating using a fork or dipping tool. Tap off excess and place on parchment-lined tray.
Step 6: Add the Zebra Stripes
Melt chocolate chips with a little coconut oil. Use a piping bag or spoon to drizzle stripes across the top of each coated cake. Let set at room temperature or refrigerate until firm.
Serving Suggestions & Storage Tips
How to Serve Zebra Cakes
These homemade Zebra Cakes are perfect for birthdays, lunchboxes, or casual dessert trays. Serve chilled or at room temperature for the best texture. For parties, arrange them on a cake stand or tiered tray alongside other retro desserts like Cosmic Brownies or Homemade Oatmeal Cream Pies. Want a themed look? Drizzle stripes in different colors to match holidays or party themes.
Storage Tips
Store your Zebra Cakes in an airtight container in the refrigerator for up to 5 days. If stacking, place parchment paper between layers to prevent sticking. For longer storage, freeze the uncoated cakes (or fully assembled ones) for up to 2 months just thaw and coat before serving.
Make Ahead and Storage
You can easily prepare the components for Zebra Cakes ahead of time. Bake the cake layer, mix the filling, or even assemble the snack cakes in advance. This makes it perfect for parties, holidays, or when you need a quick lunchbox treat ready to go.
Preparing in Advance
- Bake the cake as directed and let it cool completely.
- Cut out circles using a cookie cutter and place them on a tray.
- Freeze the cake rounds until firm to make assembly and coating easier.
- Mix the marshmallow filling and refrigerate it in an airtight container for up to 3 days.
- Assemble the snack cakes and freeze before coating, if desired.
Storing Assembled Zebra Cakes
- Once coated and decorated, let your Zebra Cakes set fully.
- Store them in an airtight container with parchment paper between layers.
- Keep refrigerated for 3–5 days for the best texture.
- Serve chilled or let them sit at room temp for 10 minutes before eating.
Freezing Uncoated or Baked Cakes
- Let cake rounds cool completely before freezing.
- Freeze uncoated, assembled snack cakes in a single layer.
- Transfer to a labeled freezer-safe bag or container.
- Freeze for up to 2 months.
- Thaw in the fridge overnight before dipping and decorating.
Reheating or Refreshing
- Zebra Cakes are best served cold or at room temperature.
- For a slightly softer bite, leave them out for 10–15 minutes before serving.
- Want extra chocolate drizzle? Warm a little chocolate and re-drizzle just before serving.
Final Thoughts
There’s something timeless about Zebra Cakes whether you remember them from school lunches or just discovered them as a fun treat. This homemade version captures everything you love about the original Little Debbie classic, but with better ingredients, richer flavor, and that satisfying made-from-scratch touch.
Whether you’re making these for a birthday party, holiday tray, or just to relive a favorite childhood snack, this Zebra Cakes recipe is a total win. Kids love them, adults sneak seconds, and they store beautifully for make-ahead convenience.
Try them once, and you’ll never go back to the boxed version again!
For more recipes follow me in Facebook and Pinterest.
FAQs
How to coat the cakes?
Dip chilled cakes in melted white chocolate or candy melts, then drizzle with chocolate stripes.
Can I use white chocolate instead of candy melts?
Yes, white chocolate works. Add a little coconut oil to make it smoother.
What’s the filling made of?
Butter, powdered sugar, marshmallow creme, vanilla, and a pinch of salt.
How many cakes does this recipe make?
Around 10–12 Zebra Cakes, depending on cutter size.